This post contains affiliate links. Meaning, I earn a commission on qualifying purchases made through these links. This is at no additional cost to you. Please read my full disclaimer here.
All photos are of products I use in my personal life.
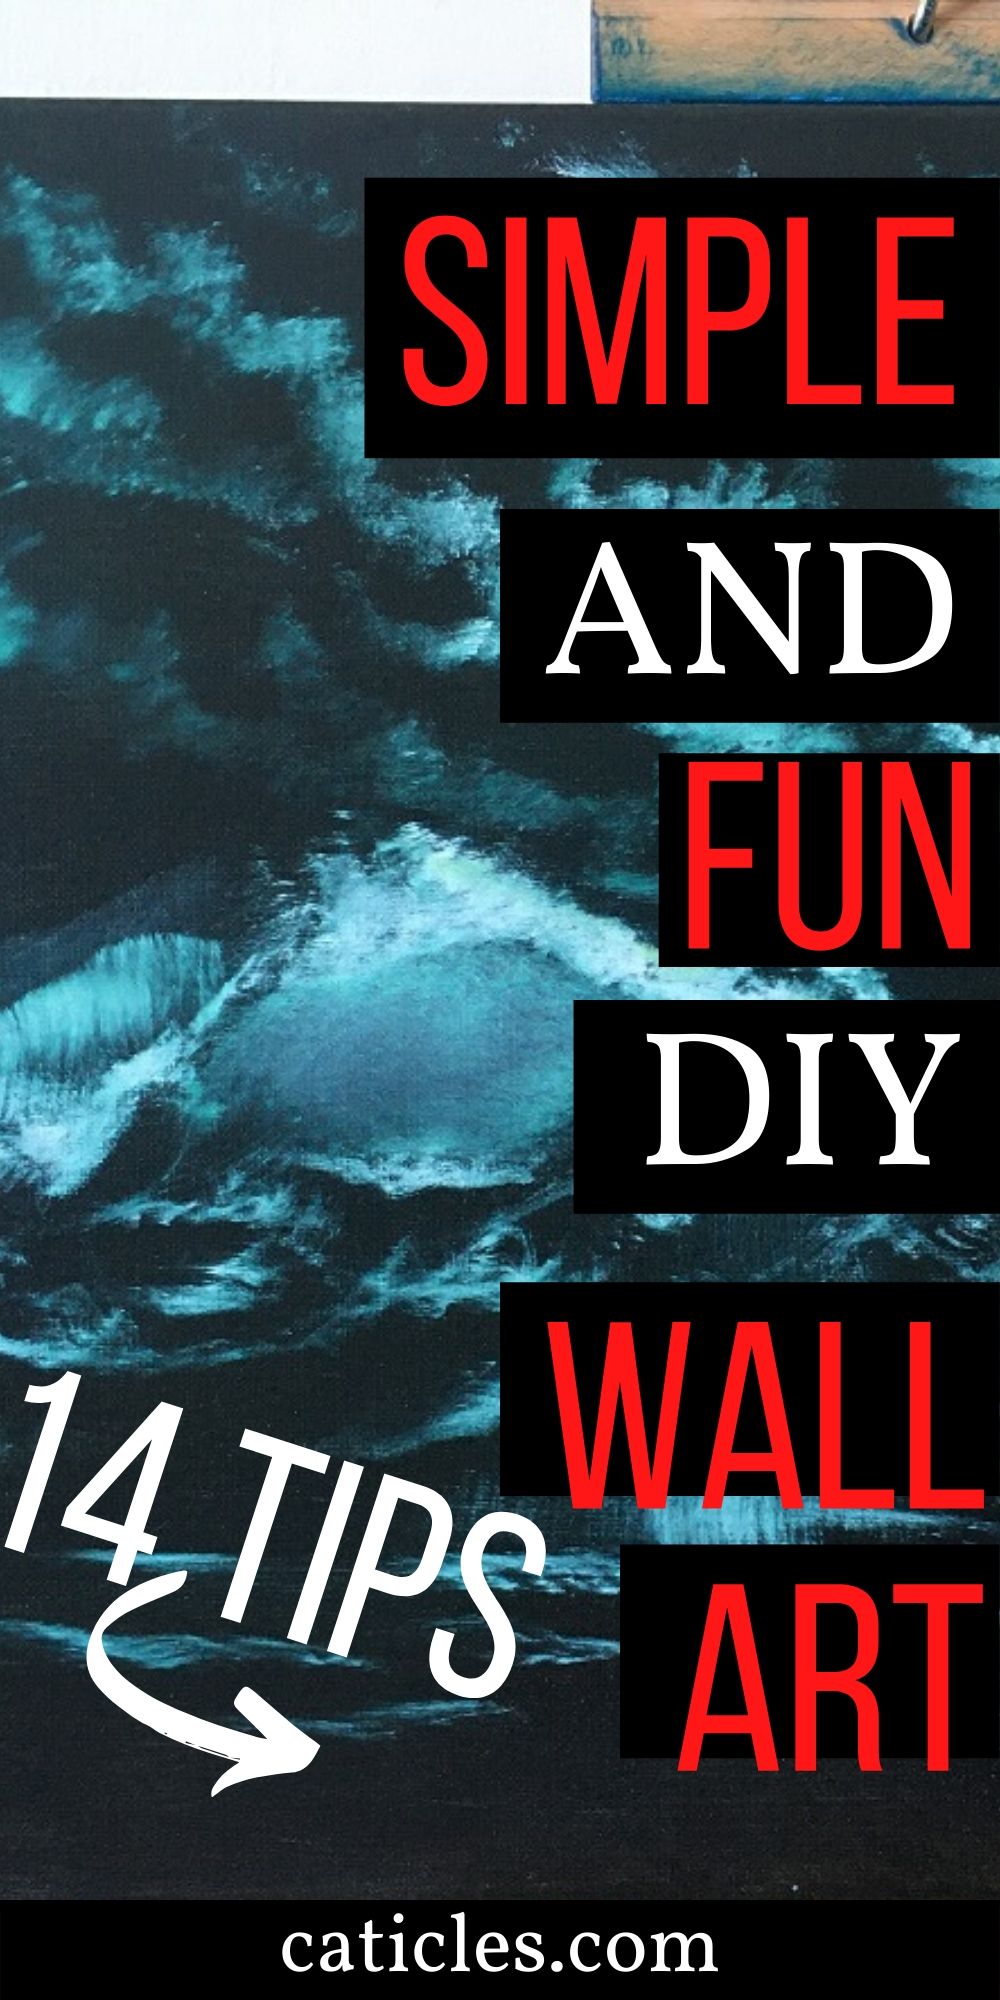
DIY Wall Art for Beginners
Looking for fun ways to dress up your walls? Consider a DIY approach to wall art.
DIY wall art is fun because you’re being creative. Being creative is challenging and therefore a very rewarding hobby.
It’s more meaningful to hang your art rather than buying.
You’ll have more of a connection to the piece because you made it. Plus, you’d be surprised at how easy it is to paint with oils.
These are oil painting tips and tricks for beginners because I’m a beginner.
So, if you’ve never painted before, I urge you to try these.
Here are my simple and fun oil painting tips for DIY wall art:
- DIY wall decor ideas
- What kind of paint does Bob Ross use?
- Are water-soluble oil paints any good?
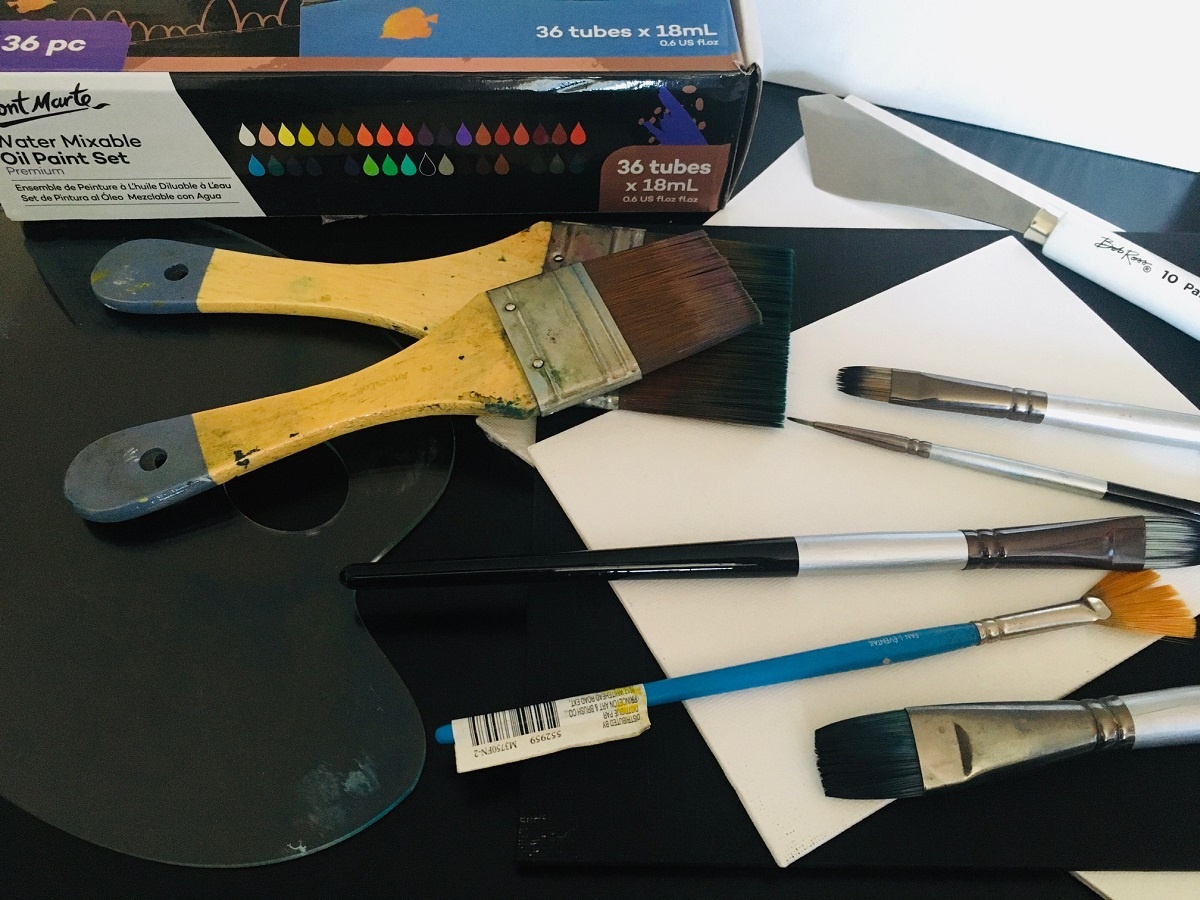
- Oil paint sets
- Oil painting brushes
- The best standing easel
- Easy painting ideas
- Oil painting tips and tricks
- Palette knife paintings
- Dramatic paintings
- City skyline
- Landscape paintings
- Aurora Borealis
- Pet portraits
Get the full list of my art supplies used in this post here.
DIY wall decor ideas
First, you need to decide what you want to paint.
Think of something that makes you happy. Perhaps a beach sunset, your first pet, flowers, or the Aurora Borealis. These sound like complicated oil paintings, but they are not.
Choose something that you feel connected to. Something that warms your heart.
Now, get a nice reference photo. You can take the picture with your phone or find one online. It is better if you’re able to print the picture.
Having a physical photo reference will be helpful when mapping out your painting. If you’re able to get contrasting lighting, that’s even better. Contrasts in lighting help you see depth and texture.
This makes the painting come to life.
What kind of paint does Bob Ross use?
We all know the late and great Bob Ross. He painted on TV for 11 years and had just over 400 episodes. Ross makes oil painting look so easy. And it is!
You just need to learn how to use the tools and hacks for each.
Bob Ross uses traditional oil paints.
You will need mineral spirits or paint thinner to clean up traditional oil paints. Some caution: even if you use odorless paint thinner, the nasty toxins are still there. And they are still harmful.
Bob Ross was on TV in the 80s and early 90s. We didn’t have advanced tools like we do today. I’m sure if Bob Ross was still alive, he’d use water-soluble oils instead.
Are water-soluble oil paints any good?
Water-soluble oils (also known as water-mixable and water-miscible) are the same quality grade as traditional oil paints.
These have been changed chemically or an agent has been added so that the oil paints are water-soluble.
This means you can clean up with soap and water. No more nasty solvents.
So, yes, water-soluble oil paints are great.
Bob Ross always promoted living your passions and being kind to nature. Water-soluble oils are right up his alley.
Oil paint sets
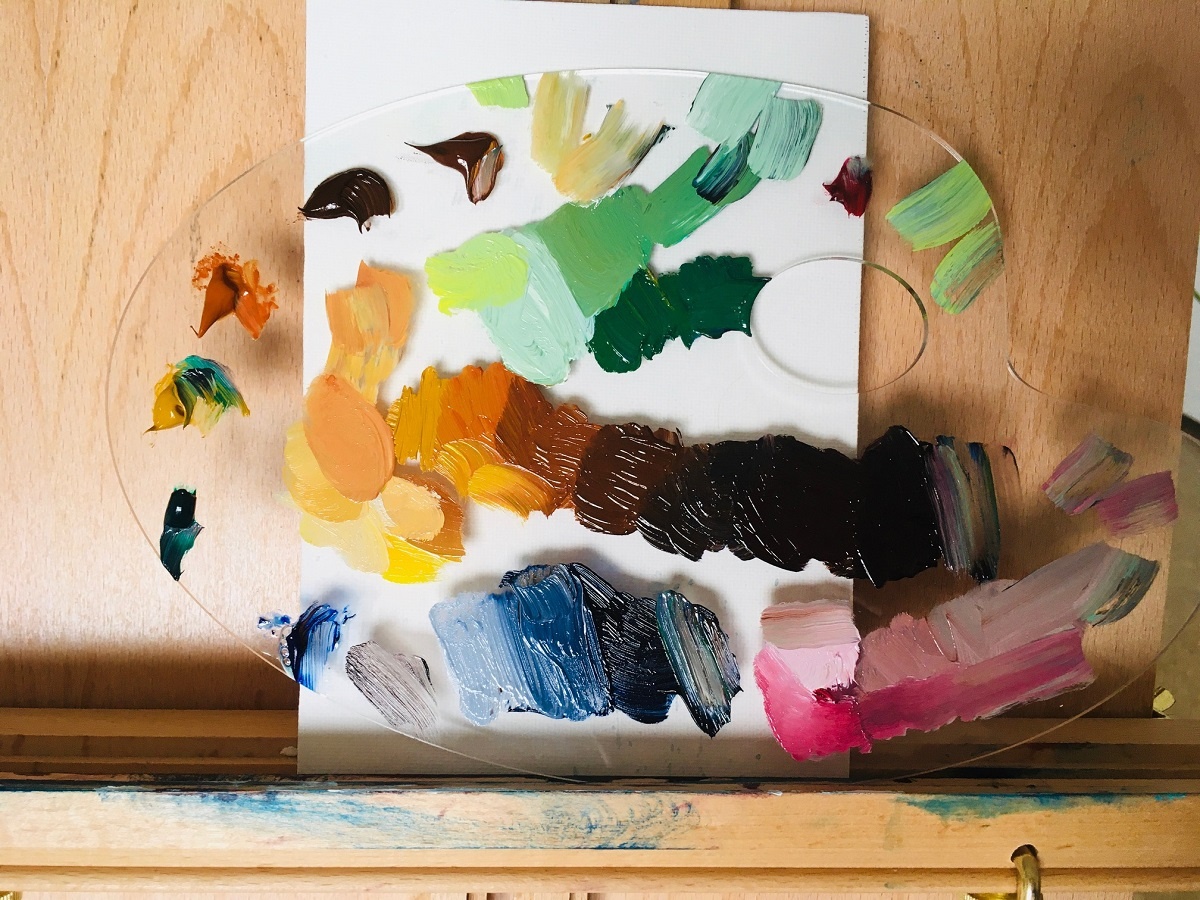
You don’t need to buy a paint set of 100s of paints. As you get the hang of it, you’ll notice it is better to mix colors.
Mixing colors adds depth, layers, and value. Start with the primary colors plus white and black.
Water-soluble oil paints tend to be more expensive than traditional oil paints. But, remember, you don’t need solvents to clean up. You’ll only need water from your sink.
Plus, water-soluble oil paints are better for you and the environment.
So, you’ll be saving there because solvents are expensive and unhealthy.
Oil painting brushes
This is where you’ll want diversity. Brushes do most of the work. You’ll find tricks and hacks for each brush with experience.
You’ll need to use synthetic brushes with water-soluble oil paints. Synthetic hairs work better with water. Oil paintbrushes can be pricey as well.
Buy the best quality that you can afford. Better quality brushes make better paint strokes. You need to learn how to use the brushes, and learning with better quality brushes, in the beginning, is helpful.
Start your paintbrush collection with a two-inch, one-inch, fan, filbert, a few round brushes, and a palette knife.
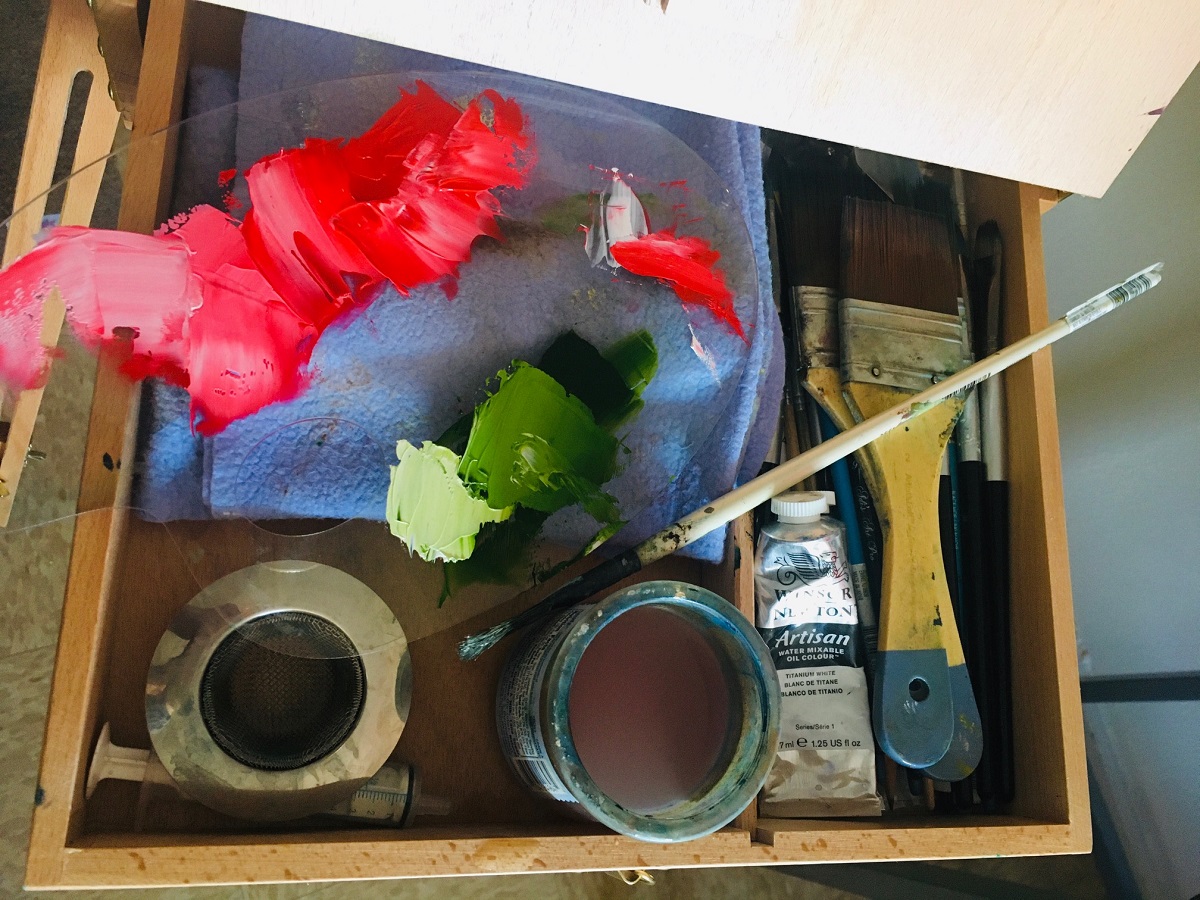
The best standing easel
You’ll need a strong easel that will hold your painting in place.
I have this easel because you can use it as a standing easel or tabletop.
It’s easy to fold down, and you can travel with it. There’s a sliding drawer where you can keep your supplies. I usually pull the drawer out while I’m painting so I have easy access to everything I need.
Easy painting ideas
Since we’re beginners we want to start with easy oil painting ideas.
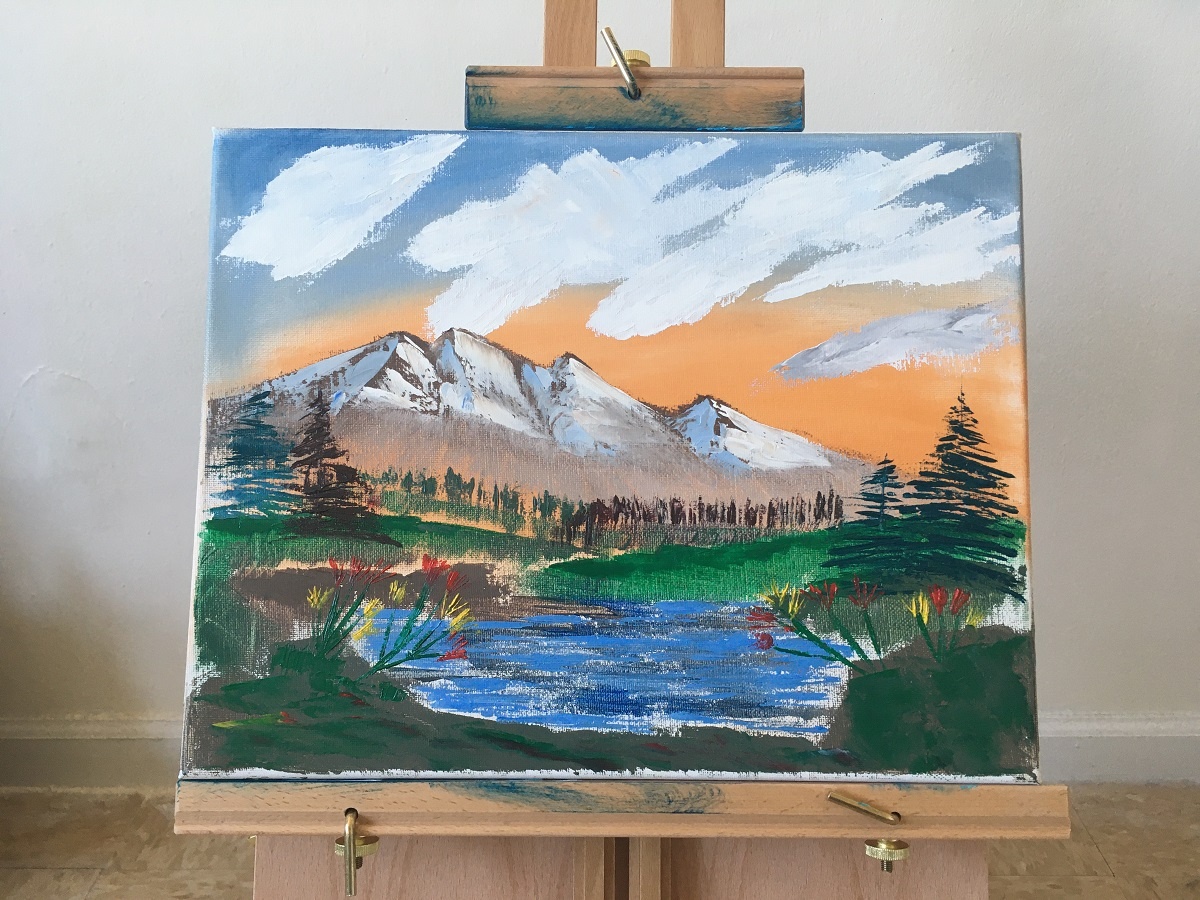
Landscape paintings
These are easiest for me because I learned from Bill Alexander and Bob Ross. They both painted many landscapes. This will help you acclimate to the tools.
You’ll have to find balance when mixing colors and loading the brush. Once you figure out these hacks, your creativity can burst.
Palette knife paintings
I find palette knife paintings fun. This is a great place to start because you only use one tool. Learning how to use the palette knife is crucial.
It comes in handy when painting snowy mountains.
Pet portraits
Portraits are a little different. Good portraits typically focus on the brush strokes.
All paintings are easy, though, once you get the hang of the tools.
Oil painting tips and tricks
“Painting is nothing but games of illusion” – Bob Ross
- It’s easier to paint on a wet canvas. You can add a touch of water to the water-soluble paints to help it along.
- Fat over lean. This refers to the paint texture. You’ll want the loosest paint (with the most water added) on the bottom layer of the painting. This will prevent cracking as the paint dries.
- Start with less paint. You can always add more.
- You need shadows and highlights. This is aesthetically pleasing to the eye because it adds depth. Plus, you need dark to see light.
- Paintings using the same colors look better. For example, when you mix a shadow color, use that base to mix highlights.
- Black canvases are fun because the colors pop. Use black acrylic to paint the canvas. It will dry in a few minutes.
- Learn how to use each brush. How you load the brush and the strokes create different looks.
- In landscapes, everything should get darker in value as it gets closer to you. Detail increases as it gets closer to you as well.
- In portraits, block in color first. Add more detail as you add each layer.
- Give yourself some distance from the painting. You’ll be able to see more detail a few feet away versus standing right in front of your painting. I often step away from my painting for a few minutes and then come back with fresh eyes.
- Take a picture of your painting. This will allow you to see more detail.
- Oil paint is very forgiving. If you paint something you don’t like, blend it out or cover it up.
- Oil paint takes weeks and sometimes months to dry completely. Keep this in mind before hanging or gifting.
- Most importantly, don’t copy your reference photo exactly. Your painting should be your interpretation. Make an indication of a tree, mountain, or pet fur. Painting is all about illusion, and this is DIY wall art. If we wanted an exact copy, we could just hang the reference photo.
Palette knife paintings
Palette knife paintings are a great place to start for beginners. Rather than using and cleaning multiple brushes, you only have one tool to worry about.
You can use the palette knife to make clouds, water, mountains, trees, a cabin, land, etc. Since the palette knife is quick and easy to clean, you’ll spend more time and focus on the painting.
You can use a big brush to cover the canvas before you start.
The painting above was done with the palette knife. I enjoy the simple flowers in the foreground.
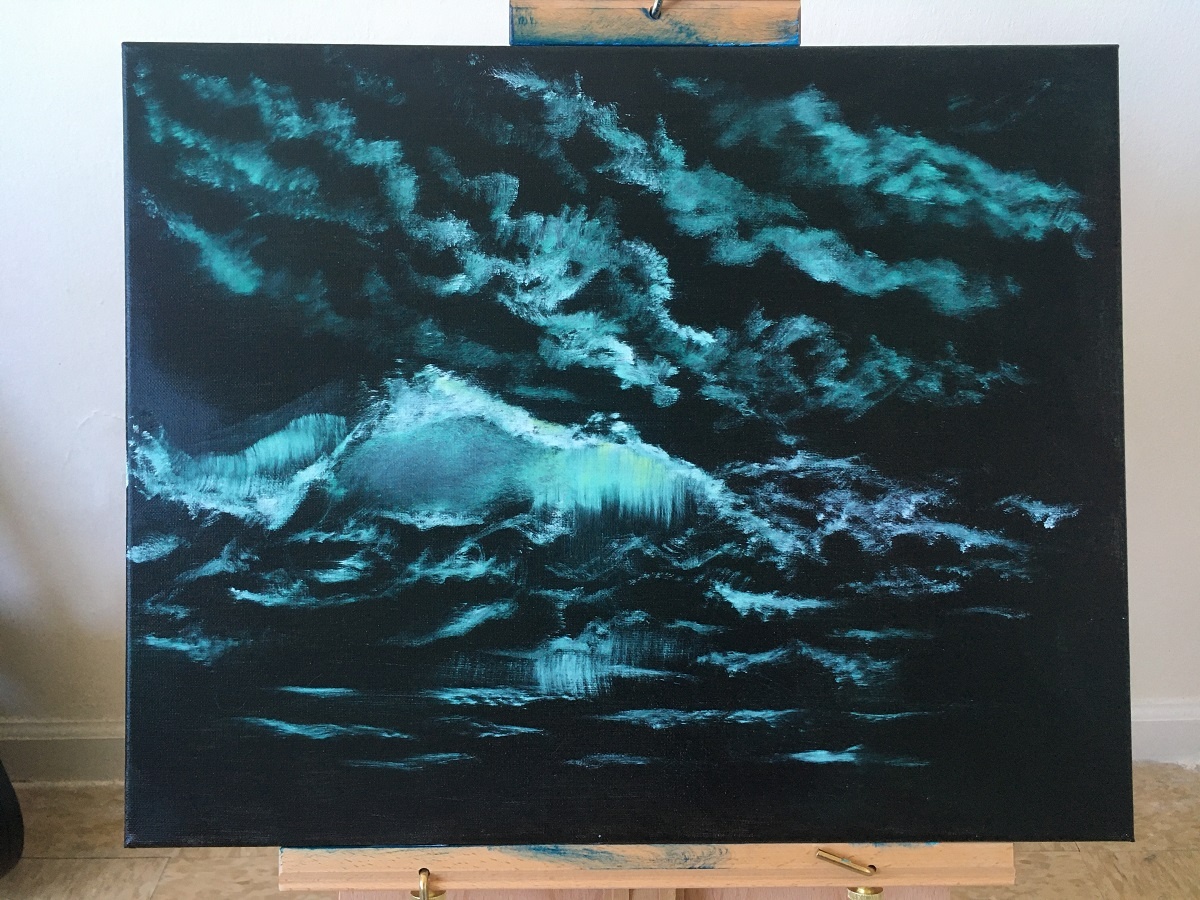
Dramatic yet simple paintings
I didn’t know how else to call this one.
You can see that it’s very dramatic. But, it’s also very simple. You only need one brush and two colors.
Start with a dark green when your black canvas is dry.
Take the fan brush through some white and make tiny continuous circles for the clouds. Keep the brush moving. You can blend it out as soft as you want.
For the waves, push the brush straight into the canvas and dance it around. There’s no other way to explain it. Just let the brush dance.
The fan brush is wonderful at creating waves in the ocean.
If you want waves with a softer look, move the fan brush along the canvas sideways in a slightly curved up back and forth motion. The more you blend, the softer it will be.
This was a piece I did following along with Bill Alexander. I put his YouTube link below. He was the man that taught Bob Ross this painting technique.
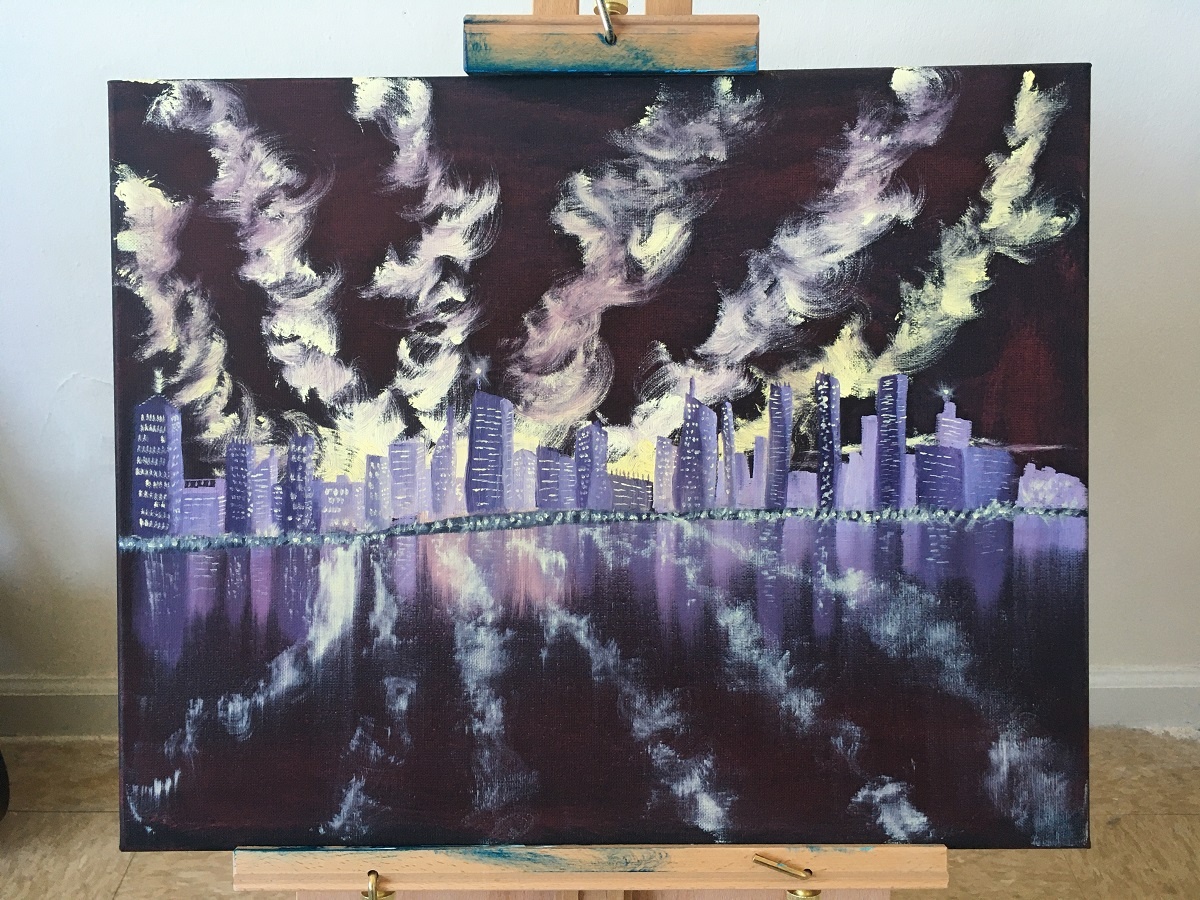
City skyline
City skylines are a lot of fun because of the lights.
You might be able to see that I put red down after the black acrylic coating was dry. You’ll do the same fan brush trick in this one for the clouds with a yellow-white mixture.
I decided not to blend out the clouds because I like the bold marks and colors. So, the yellow-white clouds and red background didn’t mix, but I still enjoy it.
For the buildings, you can see that mine don’t look too detailed. I used my base purple mix to create the highlight color. Super simple.
Use that same yellow-white mixture for the lights. The trick is to make little brush strokes.
You need varying shapes too. You’ll notice not all of them are dots of color. Then, your buildings will look like polka dots, and it will bother the eyes.
If you take a clean, dry brush and flick the lights, that will create the shining shadow that you see on the points of some buildings.
Keep it simple and don’t overdo it.
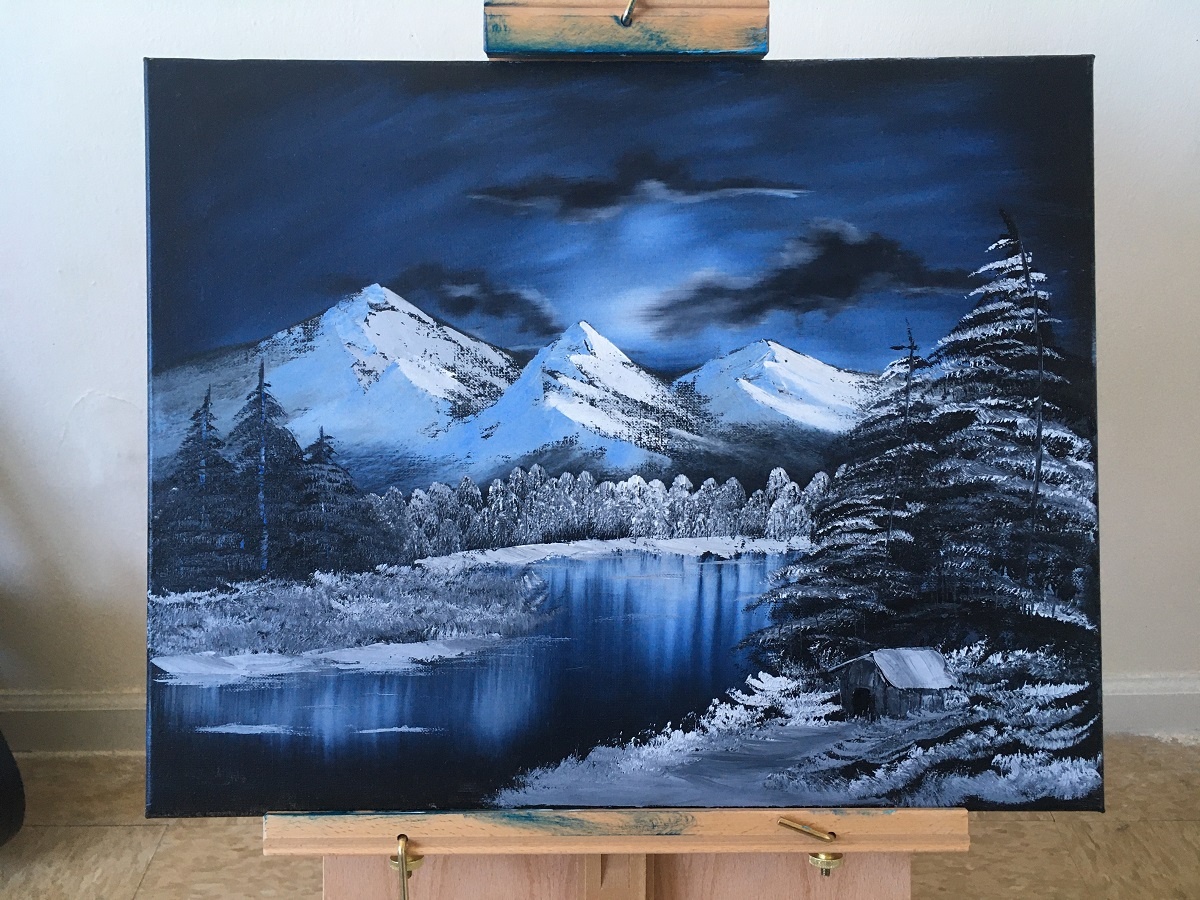
Landscape paintings
Do you see how powerful these paintings are? This is why I love black canvases.
Also, I only used blue, dark colors, and white. This proves less is more.
There are a lot of tricks when it comes to paintbrushes:
- Firmly tap the brush on the canvas to make bushes and trees.
- If you slide the brush on the canvas, you can make a meadow of snow.
- Filbert brushes make thick textured trees.
- You can load one side of the Filbert brush with shadow color and load the other side with highlight. Drag the brush on the canvas to make rocks or trees. This creates shadows and highlights in one stroke.
- Water reflections are one of my favorite illusions. Take a one- or two-inch brush and pull paint straight down from the land over the waterline. Then, take the paintbrush, and very lightly, brush across the reflections sideways. This creates a reflective water-like sheen in the paint.

Aurora Borealis painting
This illusion works best on a black canvas. I use black acrylic to paint canvases. Wait for it to dry completely. It’ll dry within ten minutes.
Choose the colors you want for your Aurora Borealis. The colors that work best are dark in blue, green, and red. These dark colors are transparent so you will still see the black canvas.
Vary these colors on the top portion of the canvas.
If you want to paint mountains and water on the bottom half of the canvas, use only blue here.
Take the paintbrush in some white and drag it across the top part of the canvas where you want the Borealis.

Paint in varying lines.
Now, take a one-inch brush and pull straight up.

This will give the illusion of soft lights. It’s very similar to making water reflections. You can blend up as much as you want, creating a softer look.

Pet portraits
Pet portraits are my favorite. I like pet portraits best because of the simple process.
Trust me, it looks more complicated than it is.
Don’t worry about detail in the beginning. Each layer will bring more detail.
Mix colors in different shades so that you have a multitude of darks and lights.
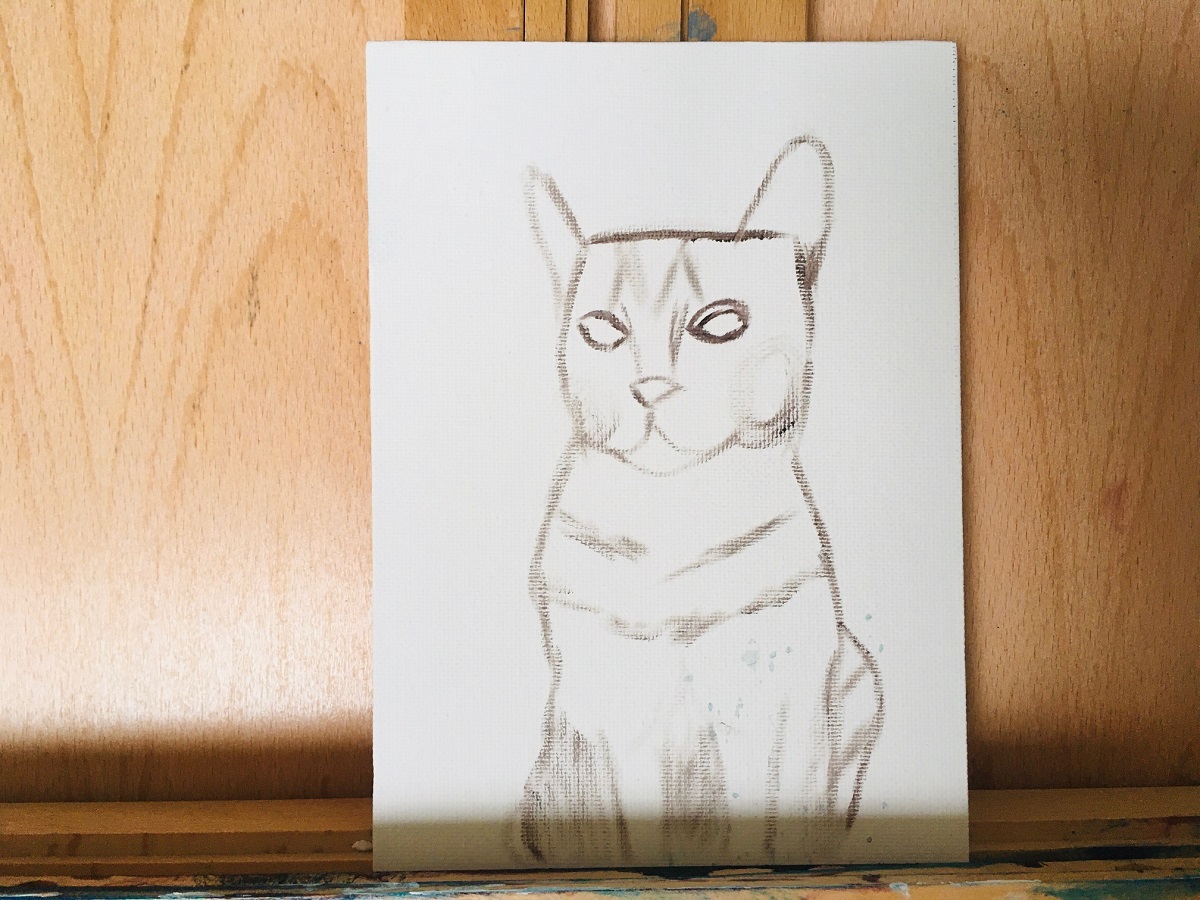
Paint your pet like a stick figure with basic shapes and outlines.
Now, add color blocks to areas based on your reference photo.
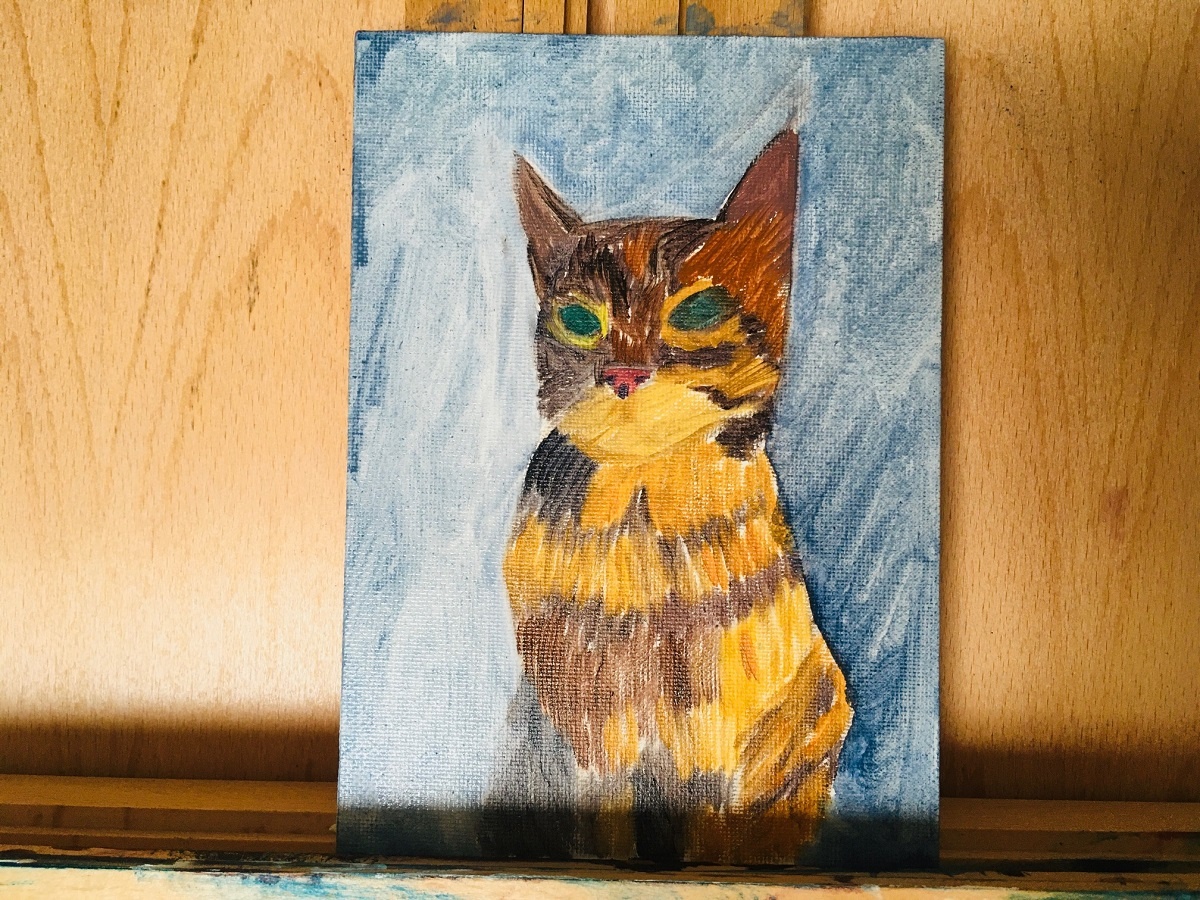
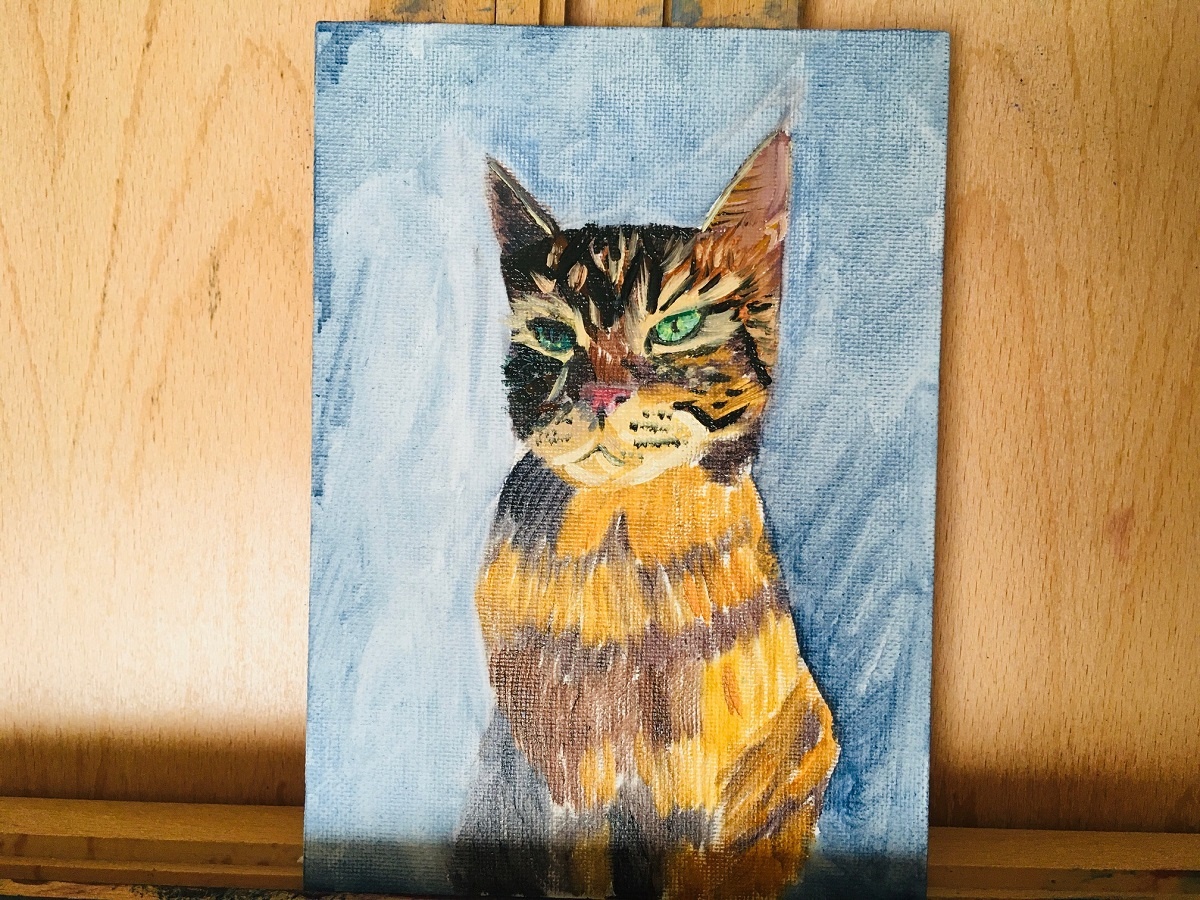
Add brush strokes in the same direction as the fur. You can blend out or create loose brush strokes to give the illusion of fur.
Each layer will have more detail. Add more detail until you are satisfied. Take your time and do one brushstroke at a time.
And, remember, don’t strive for perfection.
Personally, I like a bit of a cartoony vibe with my pet portraits. It brings more character into the mix. Plus, if I wanted an exact copy I could just print a picture. Right?
Check out my step-by-step cat portrait process (PDF guide, no opt-in required).
Give it time to load. It’s 9 pages.
Have fun! The painting should be enjoyable. It’s your world.
Create whatever DIY wall art you desire.
Related articles:
References
Bill Alexander (the man who taught Bob Ross his famous technique)